 Tweet
Tweet
Tinted my windows today and removed all panels to make it easier.
Had some spare time and decided to take photos for anyone wanting to know how to remove them.
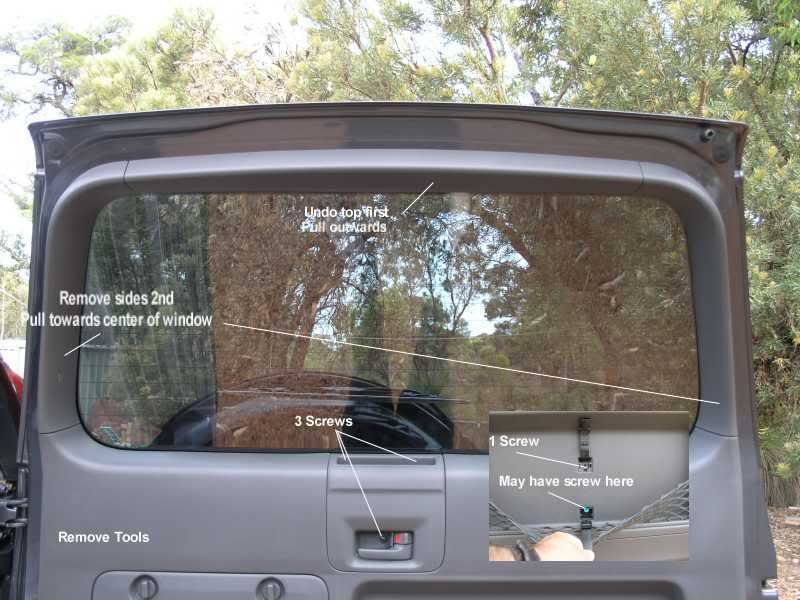
The back is easy for those who want to install a reverse camera. Remove the top window surround first, then the two sides - just make sure you pull the side window surrounds towards the center of the window otherwise the tabs will break. Take out the four screws as per photo and pull the panel off starting at the bottom.
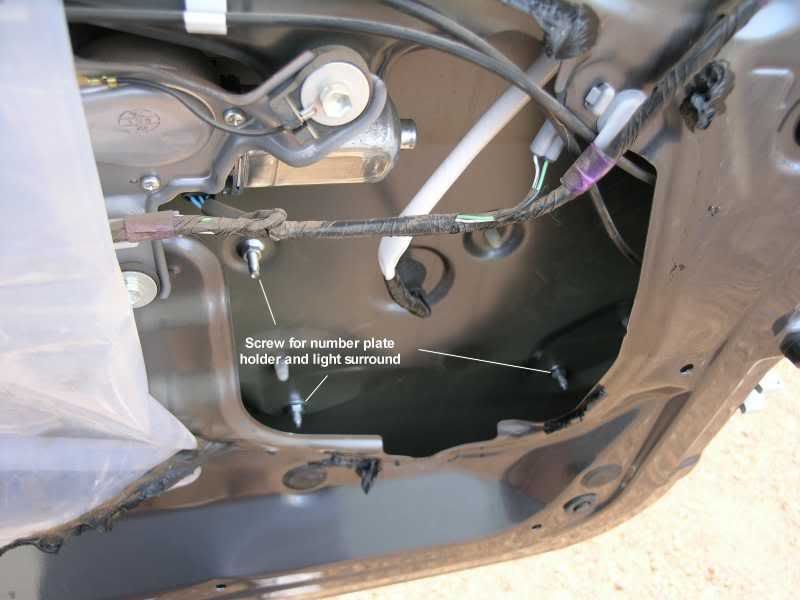
These are the three screws for the number plate holder and light - once removed just pop the clips.
Now for the doors - they are all the same.
Lift the armrest pad.

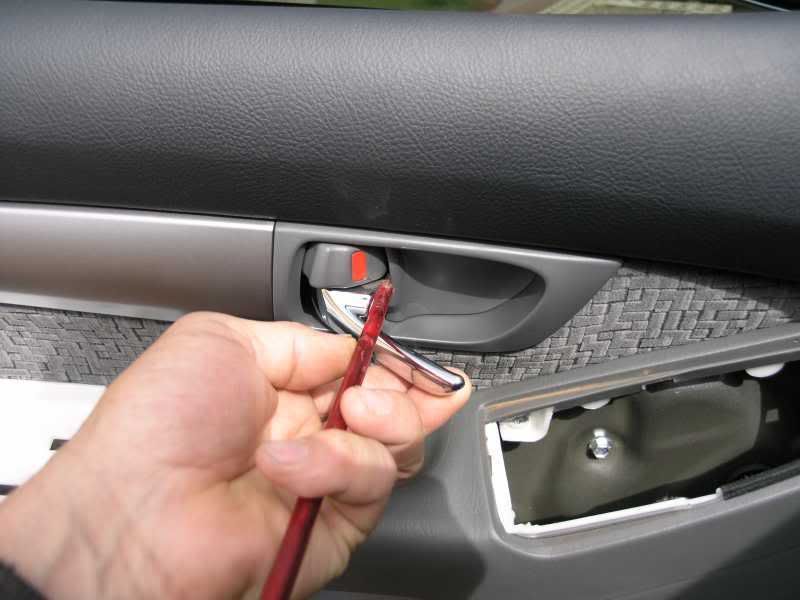
Pop out the cover behind the door lever.
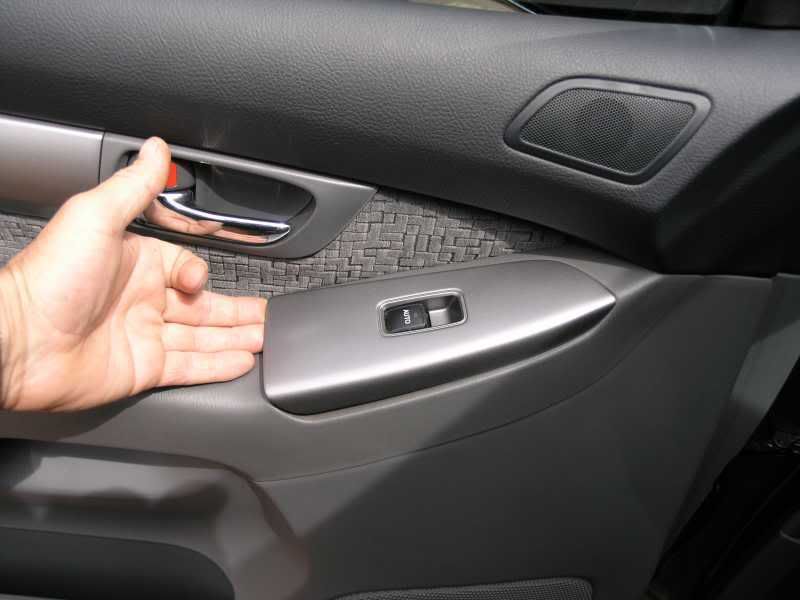
Lift the window switch panel and unplug the wires.
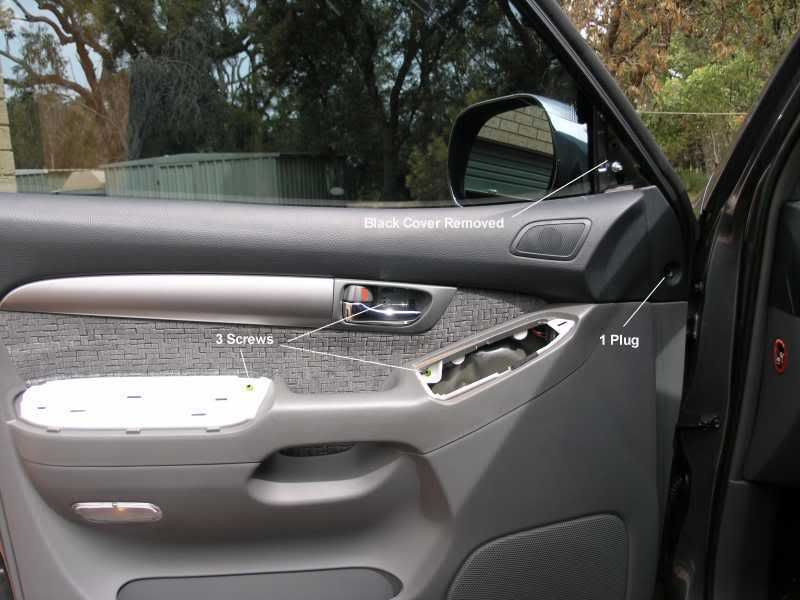
Remove the three screws and the black cover (front doors only).
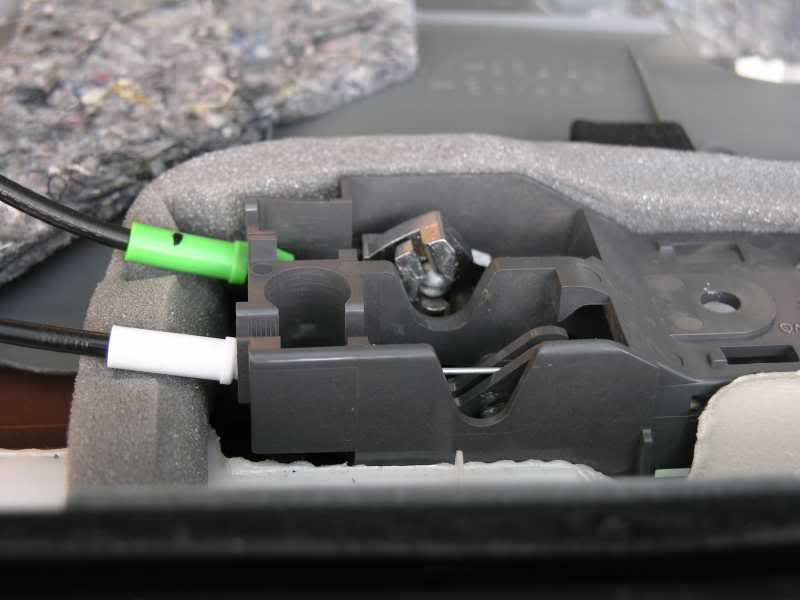
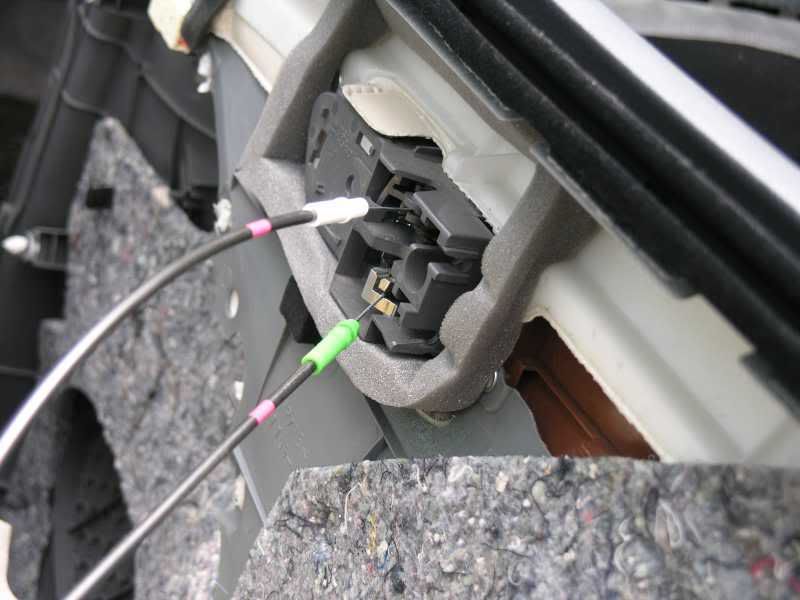
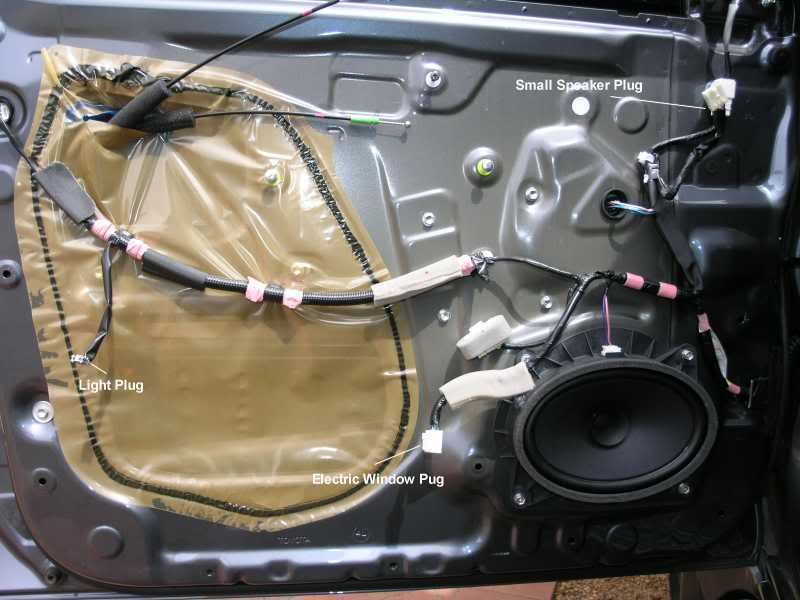
Gently pop the door panel off starting at the bottom and then lift upwards to unhook the window seal. Once free, disconnect the speaker and interior light plugs. Pop out the outer cables as per photo, then line up the inner cable with slots to remove the ball ends from mechanisms.
All done
Had some spare time and decided to take photos for anyone wanting to know how to remove them.
The back is easy for those who want to install a reverse camera. Remove the top window surround first, then the two sides - just make sure you pull the side window surrounds towards the center of the window otherwise the tabs will break. Take out the four screws as per photo and pull the panel off starting at the bottom.
These are the three screws for the number plate holder and light - once removed just pop the clips.
Now for the doors - they are all the same.
Lift the armrest pad.
Pop out the cover behind the door lever.
Lift the window switch panel and unplug the wires.
Remove the three screws and the black cover (front doors only).
Gently pop the door panel off starting at the bottom and then lift upwards to unhook the window seal. Once free, disconnect the speaker and interior light plugs. Pop out the outer cables as per photo, then line up the inner cable with slots to remove the ball ends from mechanisms.
All done
Comment